Sunday, July 7, 2013

More the Merrier Monday

Welcome back to “More the Merrier Monday” where you show off your creative side. Link up your blog post with any crafty tutorials, recipes, or tips. 

This weeks MMM is brought to you by Discount School Supply.
Save Up To 70% Off Retail + Free Shipping On Any Order Over $79! Now at DiscountSchoolSupply.com! 
Discount School Supplies

And Aquavista.
  Bring time to life with a betta fish in your clock!
300x250 banner


And now onto the party!
In order to play along, you’ll need to add the following button to your post. Edit and then simply copy & paste the html code into the top or bottom of your post. Optional, if you’re on Twitter, tweet it out so people can see it! 

<a href="http://diyhshp.blogspot.com/" target="_blank"><img src="http://i850.photobucket.com/albums/ab68/The_Hammonds/Jamies%20blog/Buttons/MMMbutton300.jpg" alt="More the Merrier Monday" border="0"/></a>
  If you link up, please take a second to view and comment on the 2 posts above you!
This way we can really get to know each other, make new friends, AND everyone gets comments.


Do you have any diy tutorials, organizing tips, or recipes that you would like to share with DIY Home Sweet Home readers? 

If so, please fill out the 'Get Featured' form for a chance to be featured on this blog!


Wednesday, July 3, 2013

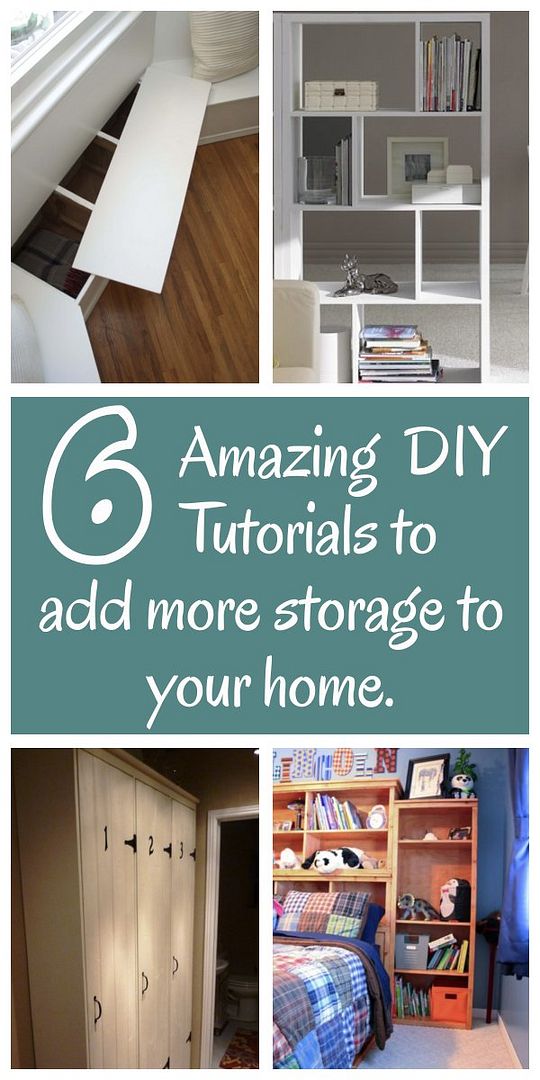
6 ways to add more storage to your home.


Use book shelves to define spaces as well as add extra storage.


Add hidden storage to a breakfast nook (or any other nook in the home) with this amazing storage bench.


These vintage lockers inspired by Pottery Barn can be built to fit any corner.


This diy storage ottoman not only provides storage but it's also a great place to prop your feet up after a long day and can provide extra seating as well. 


These diy plans not only add storage to the wall behind the bed but there is also hidden storage under the bed as well. 

Build some sturdy shelve in the garage or basement. Using plastic bins will also keep bugs and mice out. 


Do you have any diy tutorials, organizing tips, or recipes that you would like to share with DIY Home Sweet Home readers? 

If so, please fill out the 'Get Featured' form for a chance to be featured on this blog!


Tuesday, July 2, 2013

6 Refreshing drink recipes to keep you cool this summer. {kid friendly}


This recipe uses a homemade simple syrup to add that perfect sweetness and the addition of baking soda will take away any bitter taste.


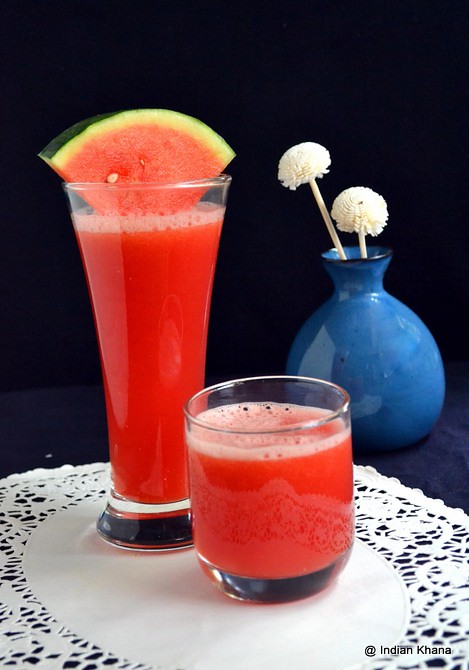
Watermelon is all over the place this time of year. This simple 2 ingredient recipe is so easy to make and can be enjoyed by the entire family.


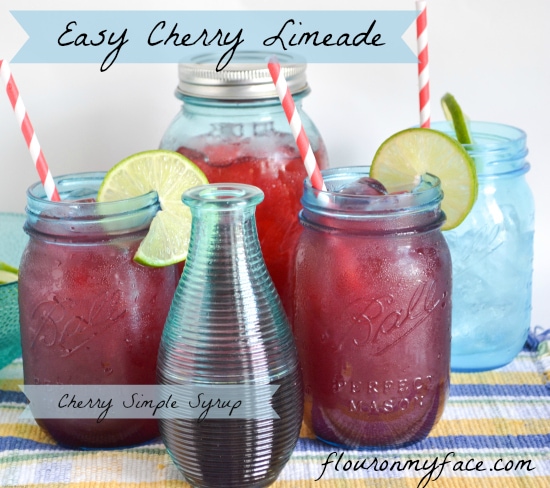
This recipe uses a homemade cherry syrup that can also be used to make multiple other recipes.


Sweetened condensed milk, sugar, and limes make up this wonderful sweet and tangy lemonade.


The combination of fresh mint leaves, fizzy lime soda, and fruit juice make up this mouthwatering recipe.


Not only is this recipe healthy but it also helps fight cancer. The sweetness of peach with a touch of lemon make this an amazing drink.


Do you have any diy tutorials, organizing tips, or recipes that you would like to share with DIY Home Sweet Home readers? 

If so, please fill out the 'Get Featured' form for a chance to be featured on this blog!


Monday, July 1, 2013

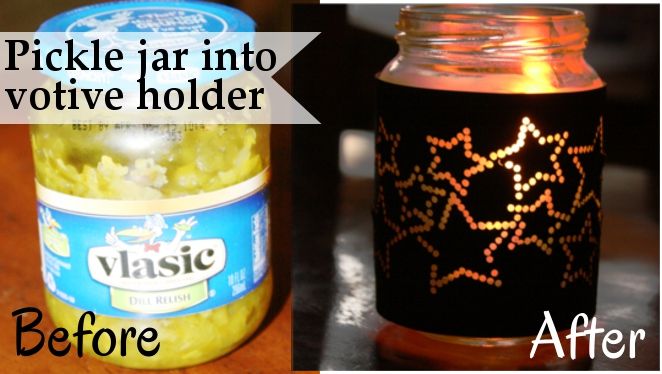
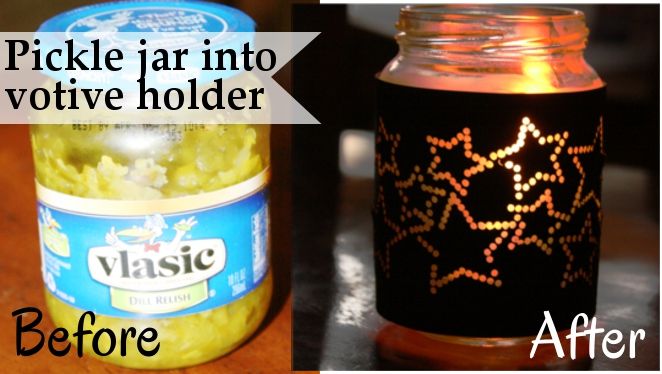
Recycled Pickle Jar into Votive Holder {plus a special Silhouette PROMO}

Last week I FINALLY got a Silhouette Cameo.
Seriously, I don't know how I managed for so long without one. 
Today I am going to be talking a little bit about the Silhouette Studio® Designer Edition Software.
For those of you who are not familiar with the Silhouette Studio® Designer Edition Software, it contains all the same functionality as Silhouette Studio® plus the following designer features.

  • Ability to open, manipulate and cut .svg files
  • Rhinestone tools to convert designs into rhinestone templates and ceate your own rhinestone designs
  • Sketch tools to convert designs into several styles of sketchable art
  • Creative knife tools to allow you to clip designs using different patterns
  • Enhanced eraser set to modify designs with more precision
  • Built-in ruler and guide lines for precise alignment and drawing


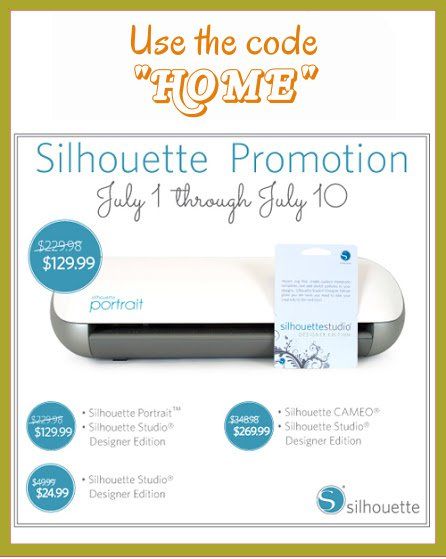
 I also couldn't be more excited to let you know that Silhouette is offering up an amazing promo to DIY Home Sweet Home readers!

The promo will run from July1st through July 10th!


  • if you already have your cutting machine, you can upgrade to the Silhouette Studio Designer Edition Software for only $25!! (It's normally $50)
  • You can get a Silhouette Portrait with the Designer Edition Software, for a total of only $129.99
  • You can get a Silhouette CAMEO with the Designer Edition Software, for a total of only $269.99


In order to take advantage of this fabulous offer, you must go HERE and enter "HOME" at checkout.


The first project I made with my Silhouette Studio Designer Edition Software where these adorable votive holders from a recycled pickle jar.


The one thing the Silhouette Studio Designer Edition Software is famous for is the rhinestone feature.
I decided to use this feature for another purpose other than rhinestones.  
 
In order to make your own votive holders and follow along with this tutorial you will need to have the Silhouette Studio Designer Edition Software. 
 

Votive Holder From Recycled Pickle Jar Tutorial.


1. Open up your image on you Silhouette Studio® Designer Edition Software. Click on your image and re-size it to your desired size. The height of your image will be the same as the sides of your glass. Since we will be doubling the image, for the width you will measure around your glass and divide that number by two. (ex. my glass is 9 inches around so I want my image width to be 8 1/2 inches)


2.
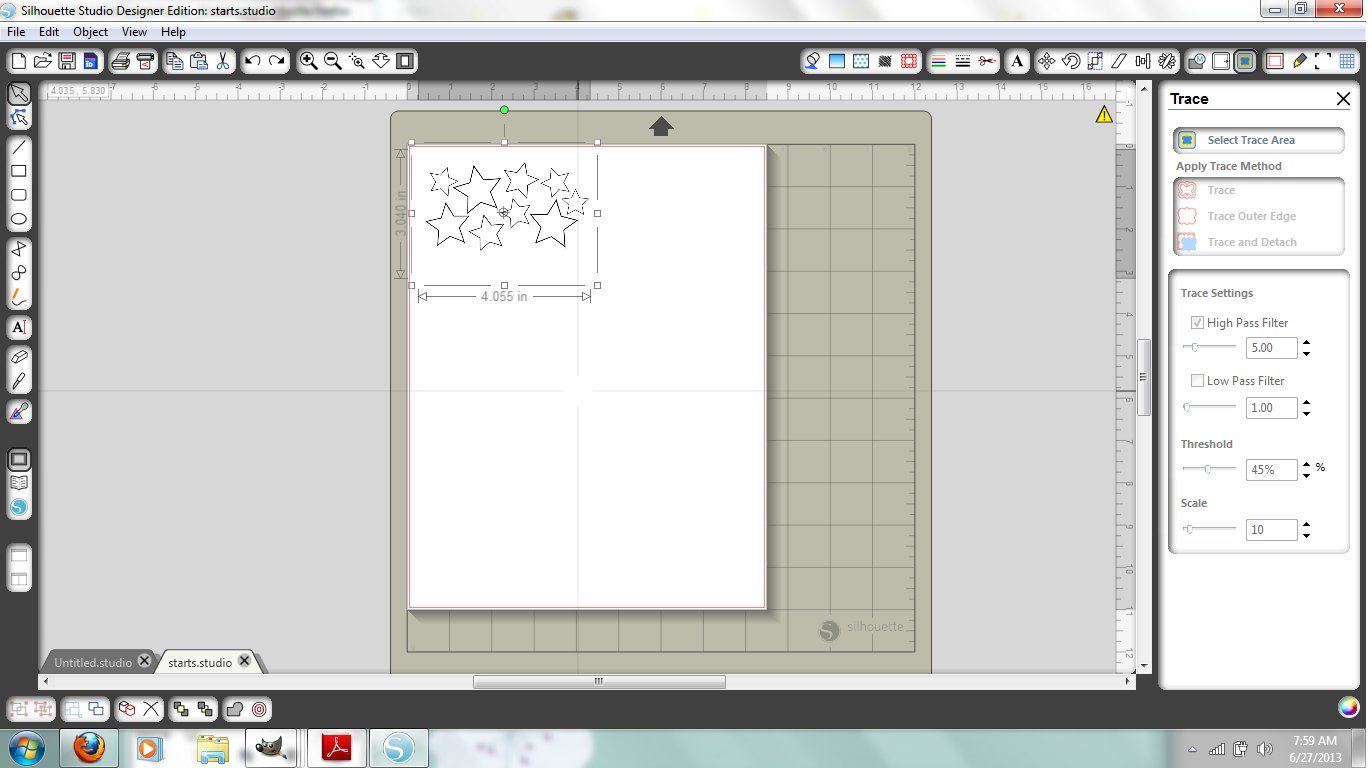
Click on the trace button (looks like a little blue butterfly with a yellow outline). Then click on 'Select Trace Area' and then drag your mouse over the area you wish to trace. Once your area is selected, click 'Trace Outer Edge'. 

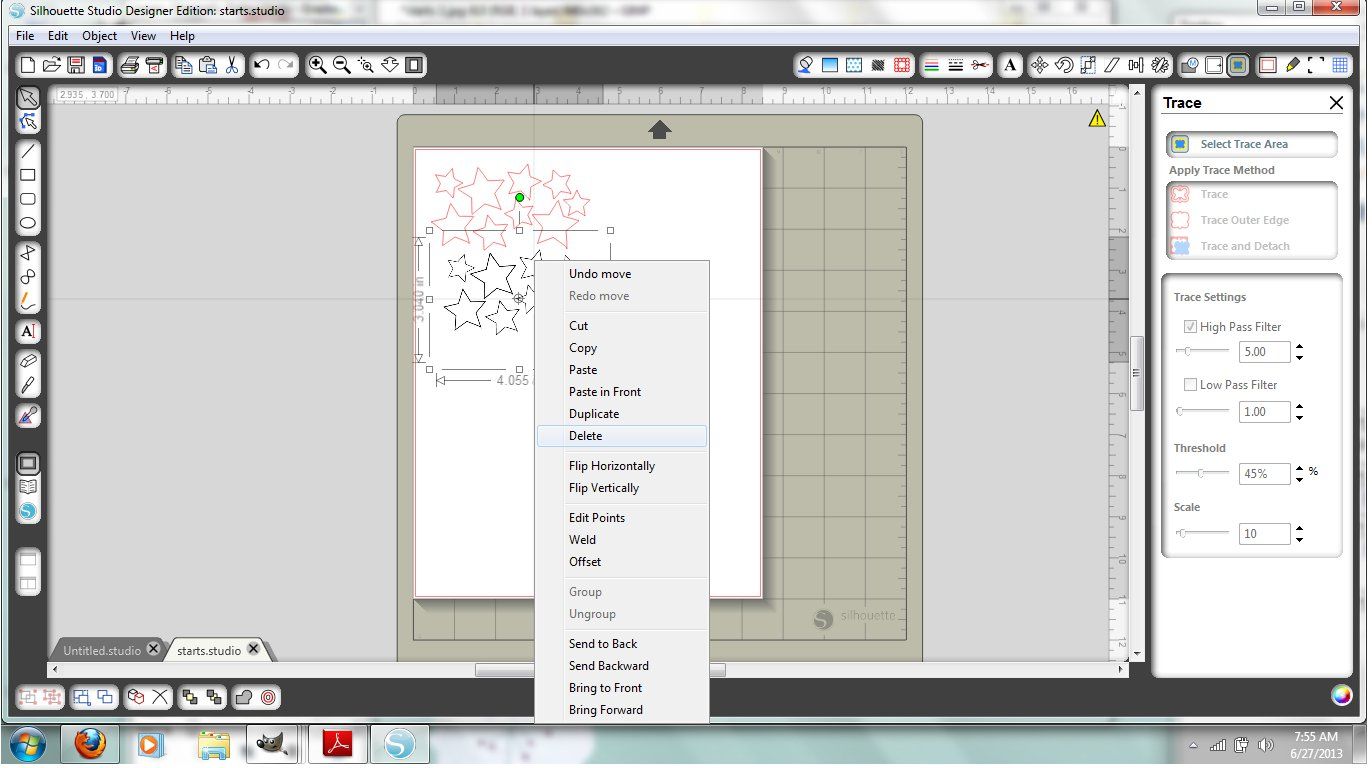
3. If you click on your image and drag it away you will notice that you now have two images. One is your original image and the other is a red outline. Right click on your original image and delete it.


4. Now you will need to double your image. To do this just select your image then click 'ctrl c'. This will copy the image to your clip board, now click 'ctrl v' to paste the image. Move your second image next to your first image.


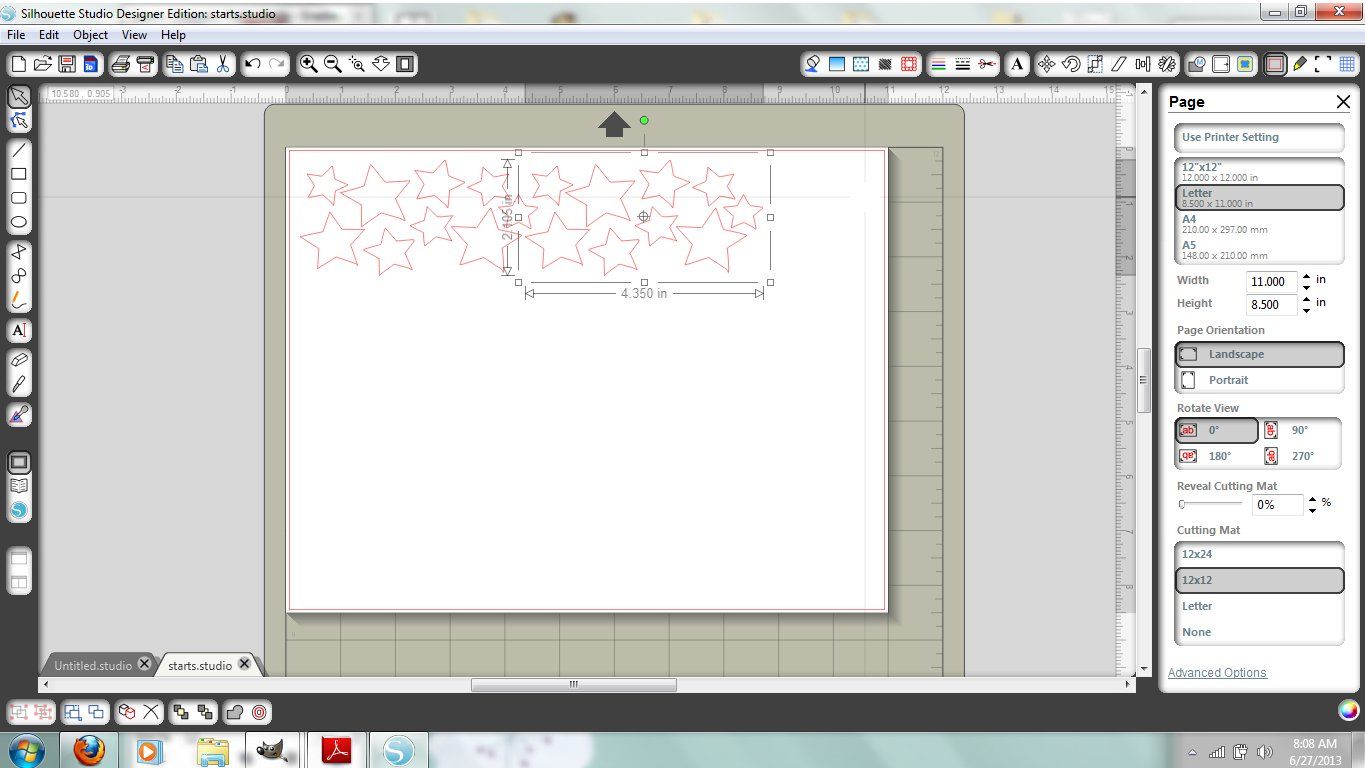
5. With your image selected click on the rhinestone option (icon looks like little red circles in the shape of a square). Your rhinestone effect will be edge, and then adjust the size to your preference. (I used the smallest size for my image). Do the same with the second image.

6. Now click the 'draw a line' icon on the left hand of the screen and draw a boarder around your stars. (You can skip this option and just cut your image to size after your done).

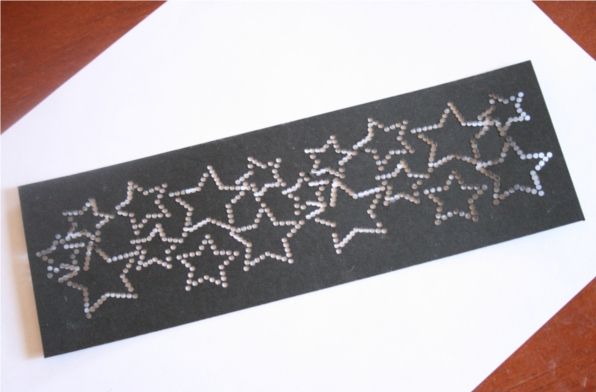
7. Here is what my image looked like once it was cut out.


8. Cover your jar in  mod podge and then glue your image to the jar.


9. Add another layer of mod podge over the image to seal it. Let the glue dry and then you are done!!


Here are some videos if you would like more information about the Silhouette Studio® Designer Edition Software


Do you have any diy tutorials, organizing tips, or recipes that you would like to share with DIY Home Sweet Home readers? 

If so, please fill out the 'Get Featured' form for a chance to be featured on this blog!


Sunday, June 30, 2013

More the Merrier Monday

Welcome back to “More the Merrier Monday” where you show off your creative side. Link up your blog post with any crafty tutorials, recipes, or tips. 

This weeks MMM is brought to you by Discount School Supply.
Save Up To 70% Off Retail + Free Shipping On Any Order Over $79! Now at DiscountSchoolSupply.com! 
Discount School Supplies

And Aquavista.
  Bring time to life with a betta fish in your clock!
300x250 banner


And now onto the party!
In order to play along, you’ll need to add the following button to your post. Edit and then simply copy & paste the html code into the top or bottom of your post. Optional, if you’re on Twitter, tweet it out so people can see it! 

<a href="http://diyhshp.blogspot.com/" target="_blank"><img src="http://i850.photobucket.com/albums/ab68/The_Hammonds/Jamies%20blog/Buttons/MMMbutton300.jpg" alt="More the Merrier Monday" border="0"/></a>
  If you link up, please take a second to view and comment on the 2 posts above you!
This way we can really get to know each other, make new friends, AND everyone gets comments.


Do you have any diy tutorials, organizing tips, or recipes that you would like to share with DIY Home Sweet Home readers? 

If so, please fill out the 'Get Featured' form for a chance to be featured on this blog!


Wednesday, June 26, 2013

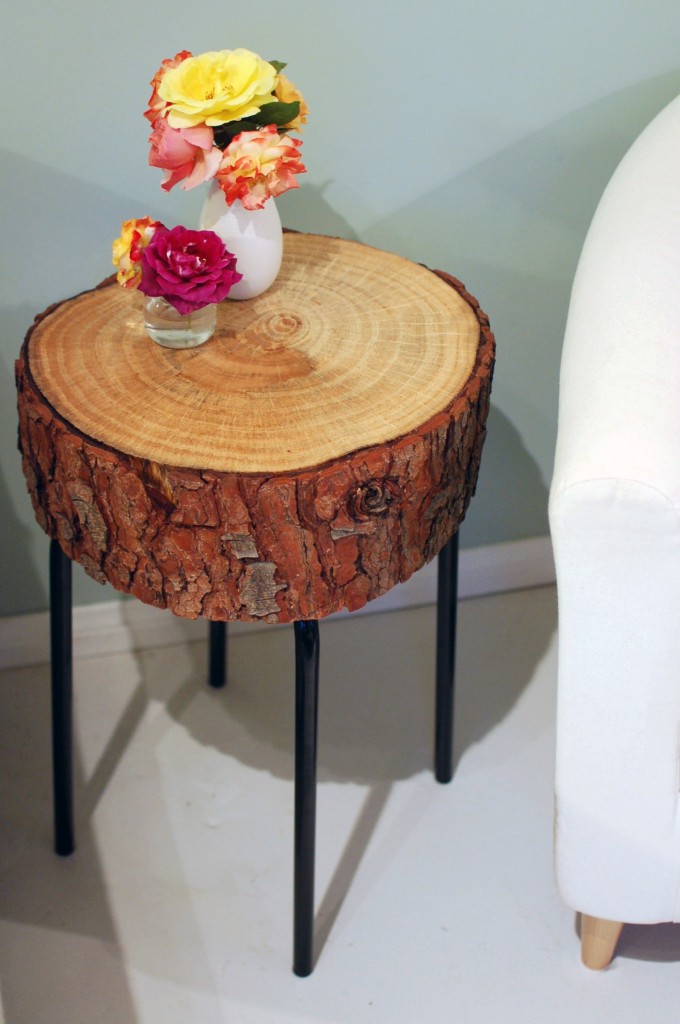
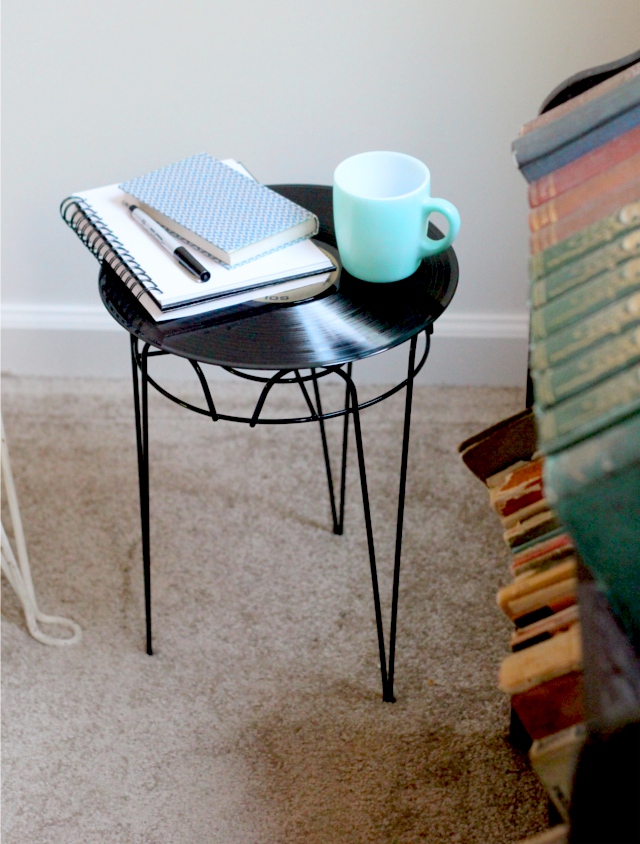
DIY End Tables


Yesterday I shared some amazing tutorials to make your own dining table. 
Today I am sharing some unique ideas for making your own end tables.


Do you have any diy tutorials, organizing tips, or recipes that you would like to share with DIY Home Sweet Home readers? 

If so, please fill out the 'Get Featured' form for a chance to be featured on this blog!